We’ve lately been busy picking berries, as is usual for us in the summer. We’re actually our biggest customers, and that’s because we don’t stop at freezing or canning our berries. Dehydrating berries for a winter supply is one of our top priorities in the summer.
Since we make our own granola, granola bars, trail mix, and other recipes, we need a lot of dried fruit, and it can get expensive. Plus, the store-bought stuff is usually loaded with sugar. We like dehydrating berries and other fruit we’ve picked ourselves because we save a lot of money while doing something good for our health.
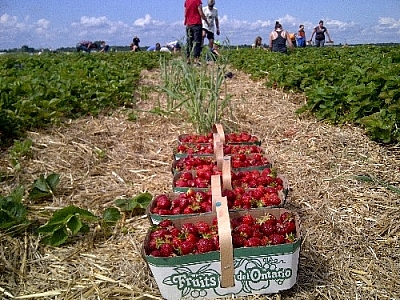
So how busy have we been? Well, strawberry season has been done for two weeks, we’re finished picking raspberries even though the season isn’t yet over, and we’re smack dab in the middle of blueberry season. We’ll be picking some black currants and blackberries next week, and if we can find the time, we’ll pick wintergreen berries, too. There’s another month or so until we start picking apples, then we’ll be picking cranberries a few weeks after that.

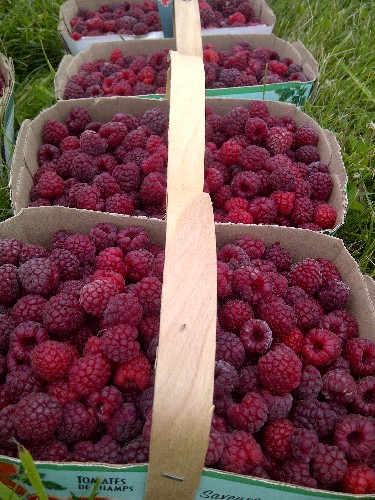

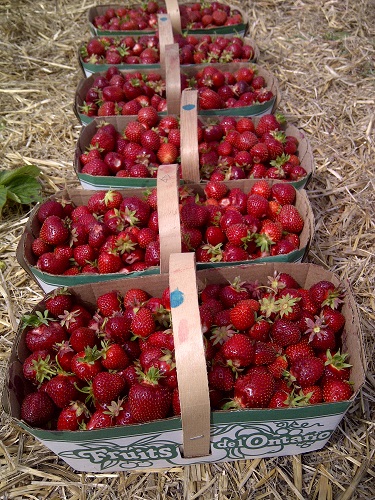
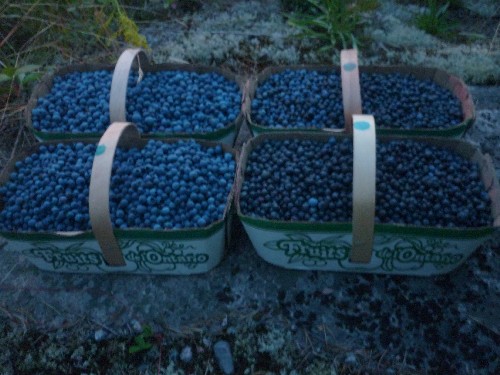

Browse the Berry Picking Comparison gallery — click any image above to view a full-sized version in a pop-up carousel.
Sure, it sounds a little crazy, but it’s all worth it! Dehydrating berries and other fruit isn’t really all that much work, especially if you haven’t picked the berries yourself (winky face). Here are ten tips that help make dehydrating berries and other fruit a huge success.
1. Choosing a Dehydrator
We really didn’t have many options when we bought our dehydrator. We decided to buy one and we wanted it right away so we could get started dehydrating berries. The berry season doesn’t last forever, so we didn’t have the luxury of buying online, only to sit around and wait.
During a shopping trip to Sudbury, we visited all the stores we could think of that might sell a dehydrator. The only place with any in stock at the time was Ramakko’s, and it was the last one available. So we bought it without having the opportunity to compare it with other models.
No matter, though. We got very lucky — we love our dehydrator! We’ve got the Nesco American Harvest Dehydrator. It’s the kind with stackable trays and a fan beneath the top lid. I highly recommend buying this Nesco dehydrator — I’ve read a little bit more about it since we bought ours, and the customer reviews I’ve seen from people who have also owned other brands have so far always been positive. That just confirms our experience — that it works great!
Here’s a shopping tip if you’re looking to buy the Nesco American Harvest Dehydrator. It comes in two models, the FD-60 which is white, and the FD-61 which is speckled grey. Beyond that, it really doesn’t matter which one you choose. The accessories fit either unit.
2. General Tips for Dehydrating Berries and Other Fruit
- Choose firm, ripe fruit and berries.
- Feel free to mix the types of fruit and berries you dehydrate at once — just make sure that if dehydrating times vary, you remove those which are ready while the rest finish up.
- Always rinse your produce when dehydrating berries and other fruit.
- Try to use similar-sized pieces to ensure an even process.
- You may choose to apply a pre-treatment such as lemon juice or sugar to preserve colour, but since we opt not to follow this method, I haven’t explained this part of the process.
- Don’t cram too much onto the tray — overloading it will take too long.
- On the other hand, try to dehydrate full loads at a time — it takes a long time so you don’t want to waste energy!
- For best results, fruits and berries should be dehydrated at 135 degrees Farenheit or 58 degrees Celsius.
- Rotate the dehydrator trays a few times during the process to ensure each tray dries evenly.
- Make sure you can be home when the dehydrating is over — you don’t want to go overboard!
- Check that berries and other fruit are fully dehydrated — if not, they can go bad quickly.
NB: Make sure to consult the final tips at #10 below as well!
3. Dehydrating Strawberries
- After rinsing your berries, remove the stems. You can use your fingers to tear them off, or you can use a knife to slice them off. Fingers are faster.
- Slice the berries evenly (usually halves are fine, or thirds for bigger ones).
- Arrange the berries on the tray so that they don’t overlap.
- Although it varies with every dehydrator, we generally find we can fit three to four litres of strawberries into one load, and that takes about seven to ten hours.
- Berries are ready when they’re no longer wet and sticky on the outside, and are chewy on the inside. Think of raisins, though not all dried fruit turn out like that…
- Strawberries flatten out quite a lot once they’re dry, but they plump up again when they hydrate.
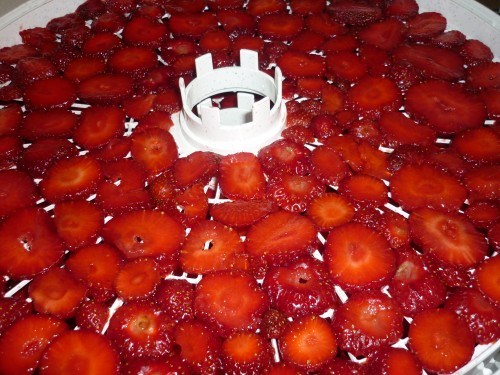

Browse the Dehydrating Strawberries gallery — click any image above to view a full-sized version in a pop-up carousel.
4. Dehydrating Blueberries
- Some people think it’s not necessary to rinse wild blueberries, but it is. Spiders make webs over plants, insects crawl all over them, wild animals defecate next to them (and who knows where they urinate?). Plus, you don’t know how often your pickers wash their hands.
- Once blueberries have been cleaned, spread them out on the dehydrator trays.
- You can fit a lot of blueberries in one load, so leave a bit more space between the berries to reduce drying time (but remember that if you have many loads, it’s not worth saving the few hours in one load compared to the time, and therefore energy, that extra loads take).
- It changes with every dehydrator, but for us, it normally takes about two litres of blueberries to fill a load, sometimes a bit more. For that amount, drying time is approximately twelve hours.
- Blueberries shrink a bit and become dry on the outside but chewy on the inside when ready. They’re a lot like raisins, except the skin doesn’t wrinkle quite as much. They get chewy when hydrated.
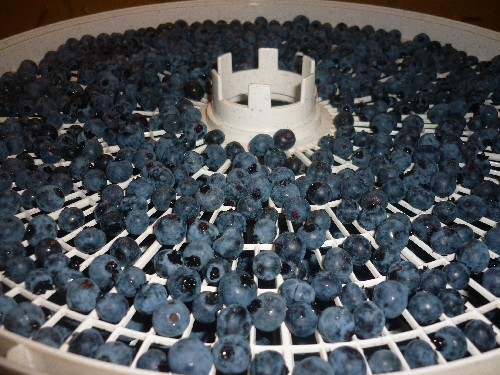
Browse the Dehydrating Blueberries gallery — click any image above to view a full-sized version in a pop-up carousel.
5. Dehydrating Raspberries
- Once you’ve rinsed your raspberries, choose the firmest ones to dehydrate. Don’t use squishy or juicy ones as they’ll flatten and stick to the dehydrator as they dry. Freeze those instead, or make some jam (smiley face).
- Place your berries evenly on the dehydrator trays without overlapping any.
- All dehydrators are different, but we usually find we can fit three to five litres in a load, and that drying time is about ten to twelve hours.
- Remember to rotate the dehydrator trays a few times during the process to guarantee that the berries on each tray will dry evenly.
- Firm raspberries retain their shape once they’re ready, and they become dry and puffy. They soften once hydrated.
- If you put any squashed or juicy raspberries in your load, they’ll have flattened out and stuck to the tray once dry, which makes them a lot tougher to take out. It hurts my fingertips (frowny face).

Browse the Dehydrated Raspberries and Black Currants gallery — click any image above to view a full-sized version in a pop-up carousel.
6. Dehydrating Black Currants
- After rinsing black currants, swipe off the stem with your thumb. Don’t worry if there’s a bit of stem left — most of the rest will come off in the dehydrator, and the rest will be easier to flake off once dry.
- Place your berries on the trays to dehydrate.
- We’ve never picked enough black currants to fill a full load, but we do know that the dehydrator can handle one litre of black currants without a problem! Kidding aside, they’re a bit tougher-skinned than blueberries, so give them a bit more time to finish drying.
- Unlike blueberries, however, black currants do get very wrinkly once they’re dry, and they shrink more, too. Black currants also get chewy when hydrated.
7. Dehydrating Cranberries
- After you’ve washed your cranberries, spread them evenly onto dehydrator trays.
- Again, we’ve never picked enough cranberries to a fill the dehydrator to capacity, but being the thickest-skinned berries of the bunch, the measly litre we picked last year took nearly 24 hours to dry!
- Different than store-bought dried cran-raisins, dehydrated wild cranberries retain their shape and don’t really get wrinkly. Rather, once they’re ready, they become dry and puffy, and they shrink just a little. They soften once hydrated.

Browse the Dehydrated Cranberries and Apples gallery — click any image above to view a full-sized version in a pop-up carousel.
8. Dehydrating Apples
- We leave the peel on when we dehydrate apples. So, once they’re rinsed, we slice them evenly. The thicker the slices, the chewier the final result. The thinner, the crispier.
- Then, arrange the apple slices onto the dehydrator trays without overlapping them.
- All dehydrators are different, but we’ve usually found we can fit three or four regular-sized apples in a load, which takes about five or six hours to dry.
- Apples are dry to the touch once dehydrated. Whether crispy or chewy depends on how thinly or thickly they were sliced.
9. Dehydrating Bananas
- Instead of rinsing bananas, you peel them (winky face).
- Slice them thinly and evenly — they’re nice and crispy when thinly sliced, but the chewy consistency of thicker slices isn’t pleasant.
- Arrange the banana slices on dehydrator trays without overlapping any.
- It changes with each dehydrator, but we can put five or six bananas on average into a load, which only takes three or four hours at the most.
- Bananas are dry and don’t feel sticky once they’re done.
- The banana slices might stick to the trays a little as you take them off, though. It’s not nearly as bad as with the raspberries, however.
10. Final Tips for Dehydrating Berries and Other Fruit
- When dehydrating berries and other fruit, you’ll see the colour intensify and the flavour will concentrate. Both are amazing!
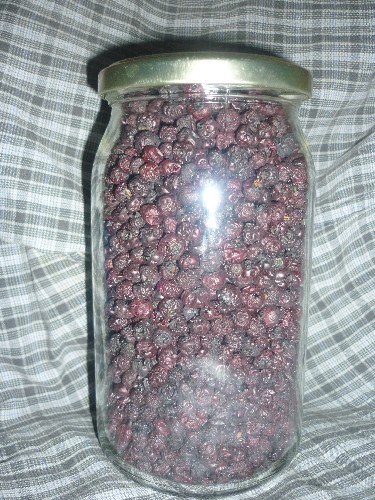
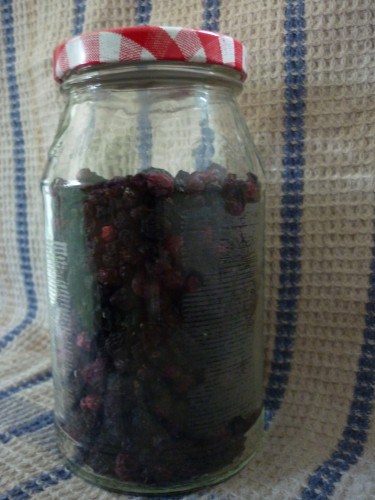
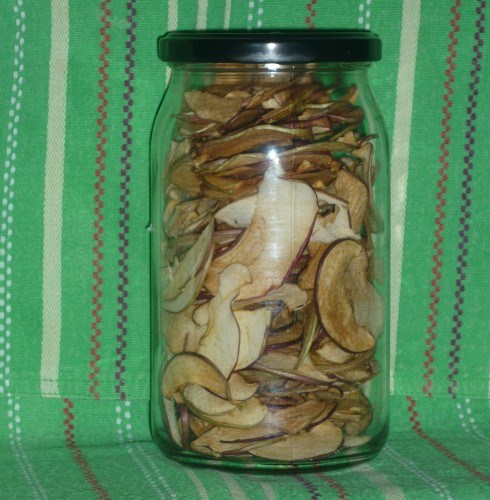
- Store dehydrated berries in glass jars in the fridge if you’re planning on keeping a supply through the winter — they’ll stay fresher longer that way. Leave them in the cupboard if you plan on using them relatively quickly.
- Let your dehydrated berries cool down before putting them in the fridge — you don’t want condensation to get to them!
- Likewise, if you store your dehydrated berries in the cupboard for short-term use, keep them cool and dry so moisture doesn’t get in.
- If you really like dehydrating berries or if you dehydrate large amounts, you can buy additional trays for the American Harvest dehydrator. Our dehydrator came with four trays, but it can fit up to twelve. It’s too late to do us any good this year, but we’re planning on buying eight more trays over the winter or in the spring, in time for next season. We’ll be needing the trays for the grey FD-61 model if we want them to match our dehydrator, but perhaps you’ll need the trays for the white FD-60 model.
- Dehydrating berries and other fruit aren’t the only things you can do with a dehydrator! For example, we make yogurt rolls and almond flour as well. You can also dehydrate sauces and soups, vegetables, herbs, meats for jerky, flowers for potpourri, clay and dough for arts and crafts, and so much more.
- To dehydrate liquids with your Nesco American Harvest Dehydrator, you’ll need special sauce sheets to place over your regular dehydrator trays. Our dehydrator came with one, but we somehow managed to heat ours out of shape, so we’ll buy a bunch when we order our extra dehydrator trays. (I’m not placing blame, but there’s a reason I don’t know exactly what happened to our sauce sheet — lol!)
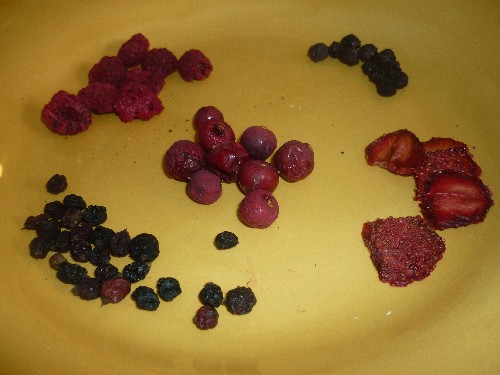

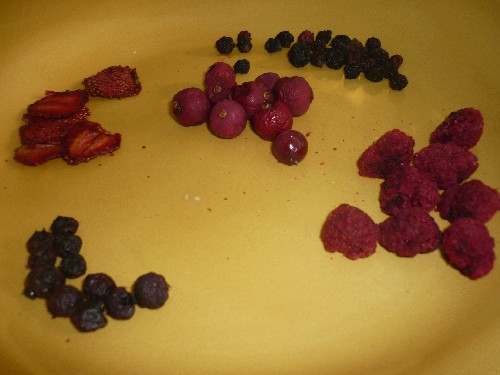
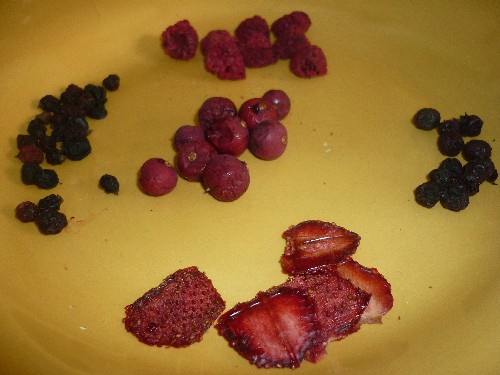
Browse the Assorted Dehydrated Berries Comparison gallery — click any image above to view a full-sized version in a pop-up carousel.
Plus, I’ve put together a photo album of all kinds of berries we pick which I hope you’ll browse through. It’s got a bunch of new pictures from this year which I haven’t posted anywhere else, plus a couple of past favourites. Enjoy!


great website with terrific ideas and recipes, easy way to dehydrate berries. thanx
Thank you very much!
Thanks so much for sharing about the process of dehydrating
fruits and berries! My niece is trying the blueberries today, but it
seems like they are taking too long to dry, at 115 degrees. So she turned them up to 135. My question is this: would it help to open up
the skins themselves to let some of the juices out, and hence, dry
the berries more quickly? I was actually thinking of using a potato
masher and just barely pushing down on the berries to break the
skins. Is that a no-no, or not? Would love to hear from you! We
live in Oregon and have a farm with large home garden, green
house and fruit orchard. Thank you for listening!