Quite a few years ago now, I began experimenting with dehydrating foods such as our own hand-picked berries. At first, one of our main uses for the dried berries was to make trail mix for our backcountry trips. But I soon realized that I could easily diversify the foods we eat while out on the trail by making dehydrated yogurt rolls. This yummy, healthy snack is perfect for backpacking because it packs a lot of punch in a small, lightweight package. And since it’s so easy to make, it’s also great for school and work lunches.
One of the main advantages of making dehydrated yogurt rolls as part of our backcountry meal plans is that they add much-needed calcium and probiotics to our trail diet. Because dehydrated yogurt rolls will last about a week unrefrigerated, 1 they can be a real treat on multi-day trips, when delicious and nutritious food is a must. And consuming probiotics on backpacking trips is important because many of the dehydrated meals we eat are really high in fibre, too high in fact, so the probiotics help keep things regular.
But what busy parents will love most is that dehydrated yogurt rolls generally last several weeks in the fridge. And, they can even be frozen for a few months without affecting their nutritional value. 2 While bigger batches take longer to dry, it might be worth the extra few hours to have a lot of these yummy, healthy snacks handy.
While we began dehydrating yogurt a few years ago, it wasn’t until last summer that we finally perfected our method. Having practiced it a few more times this season, I’m ready to share this easy recipe — and our best tips — for homemade dehydrated yogurt rolls.
Ingredients & Tools Needed to Dehydrate Yogurt
So if you’re ready to add some variety to your trail, school, or work snacks with your own dehydrated yogurt rolls, the first thing you’ll need is a good dehydrator. I highly recommend the Nesco American Harvest Dehydrator — we’ve owned one for about four years, and we absolutely love it! It works really well for dehydrating yogurt because it has a wide temperature range, and because the stackable trays make it easy to rotate foods for even drying.
You may also wish to purchase sauce sheets for your dehydrator, so that you can dehydrate liquids as well. Trust me, it’s worth it, because once you start dehydrating, you’ll keep thinking of more and more things you can dry!
However, it’s easier to make dehydrated yogurt rolls using waxed paper. This way, you can just take everything out once it’s all ready, cut it to size, and roll it up. Using a sauce sheet, we always had to scrape the yogurt off the tray, which would come off in pieces too small to roll. Plus, there was always a sticky mess left to clean!
After you’ve measured out a length of waxed paper, place it on a dehydrator tray with the two short sides overlapping the edges, and cut a hole out in the middle to allow air flow for even drying.
Lastly, you’ll want to choose the right type of yogurt for your purpose:
- If you’re making dehydrated yogurt rolls for school or work, feel free to select higher fat content yogurt, but if you’re taking them out into the backcountry for a few days, then it’s best to use low-fat yogurt, 1 which will last longer.
- Try to choose a yogurt that doesn’t contain high sugar content or added sweeteners, which will take longer to dry. 3
- Avoid yogurts made with gelatin — choose pectin instead. Gelatin won’t dry completely, 1 whereas pectin will help keep the rolls pliable. 3 This is good news for vegetarians!
- We like to use vanilla-flavoured yogurt, but you can also use fruit-flavoured varieties. Even better, choose a plain yogurt and blend in a fruit purée. Add no more than a cup to the recipe below.

Dehydrated Yogurt Rolls Recipe
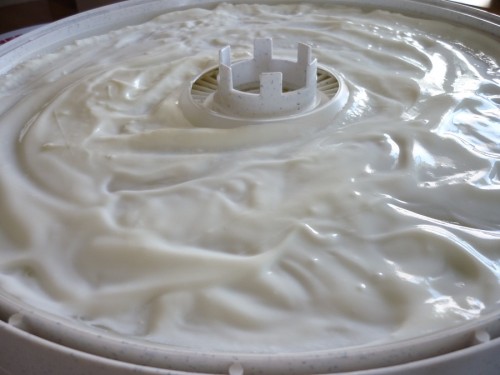
Now that you’re ready to start dehydrating yogurt, you’re probably wondering how much to make. I usually use one cup of yogurt per tray. Spread it evenly over your sauce sheet or waxed paper, at least an eighth of an inch thick and no more than a quarter-inch thick.
Next, setting the thermostat to the correct temperature is very important. Interestingly, the thermostat on a dehydrator refers to the temperature of the food, not the air inside. 4 This little-known fact is particularly relevant when dehydrating yogurt because it involves a couple of key considerations, especially for those following a raw food diet:
- The nutritional value of food begins to deteriorate once internal temperatures reach 118 degrees Farenheit or more for extended periods of time (such as the dehydration process). 5 A number of enzymes are killed, some vitamins destroyed, and pH levels altered. 4
- For the probiotics in yogurt to survive the dehydration process, internal temperatures shouldn’t exceed 105 to 110 degrees Farenheit. 6 The same is true to preserve the raw food integrity of fresh fruit added to the recipe. 7
Personally, I set my thermostat to 110 or 115 degrees Farenheit. At that rate, it takes about 6 hours for the yogurt to dehydrate. If you’re using a stackable dehydrator like the Nesco American Harvest Dehydrator, place the yogurt tray on the top level, nearest to the fan, rotating it 180 degrees every two hours. If you’re dehydrating more than one tray at once, remember to rotate the stack order of the trays as well, so that each tray gets a turn positioned closest to the fan.

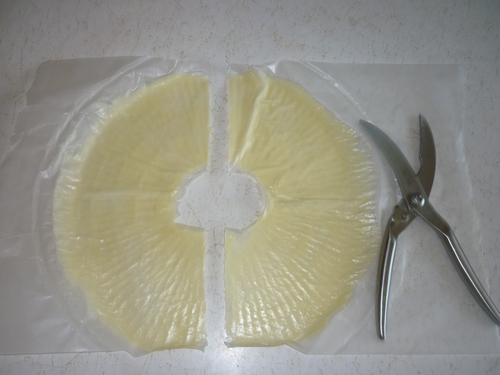
The dehydrated yogurt is ready once it’s completely dry to the touch, and not at all sticky. You’ll notice that the colour will have intensified — and the same will have happened to the flavour!
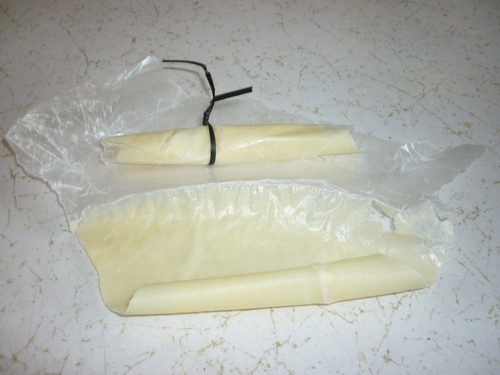
Let the dehydrated yogurt cool down, then use kitchen shears or clean scissors to cut out strips. Roll them up, secure them with a rubber band or twist tie, and voilà! I usually make six rolls per tray. Since the ends aren’t closed, I then store them in a resealable plastic baggie.
Come chow time, peel the dehydrated yogurt off the waxed paper as you unroll it, just like any other roll-up snack. Enjoy (smiley face).


Search Niackery
×