Worms may not be something people would normally want in their kitchens, but Marc and I have kept a bin of them in ours for fifteen months now and have grown to respect them (if not quite love them) as much as our pets and laying hens.
In November 2011, we joined a vermicomposting workshop in Sudbury offered by reThink Green and given by Friendly Worm Guy Jeff Sonnenburg and his wife Lori. When we’re living in an apartment, we can’t compost without getting creative, and that’s especially true in the winter. Well, we were more than willing to learn how. We did absorb quite a lot during those two hours and left with a starter kit. Even so, initially, a lot was — and still remains — up to trial and error, so I wanted to get a better handle on the whole process before writing about it. Now, after over a year of experimenting and with the cheery thought of spring around the corner and another gardening season upon us, it’s time to get my pen dirty.
Experienced gardeners may not necessarily need to take a workshop to get into vermicomposting, but as newbies, Marc and I didn’t want to take any chances. As with when we began brewing kombucha tea, I had one main concern about keeping worms: What if we screw up and kill them? So during the workshop, we both paid the utmost attention to the speakers and took copious notes. Every once in a while, if there was something I wasn’t quite sure about, I’d look over at Marc and think, “Ok, he looks like he’s getting this. We’re good.”
But it’s surprising how people retain information differently! On the drive home, we discussed — debated — the afternoon’s session and realised we’d be needing Friendly Worm Guy’s awesome blog-guide to vermicomposting sooner than we’d thought. We were able to find the answers to all our questions on the site and got our bin started right away.
Setting up the bin is pretty easy. First, tear or cut old newspaper into small bits, or put used computer paper through the shredder. Pack it loosely into the bin to about half, then pour about two cups of water into the bin, making sure all the liquid is absorbed by the paper. If it’s too wet, add more paper. The bin’s contents should be damp but not wet. The worms will try to escape the bin if it’s too wet but they’ll die if it’s too dry.
Next, mix in your worms — ours came in organic materials (decomposing food and worm castings), not earth (different type of worms), which is needed to get the bin going. The worms only eat decomposing (read rotting) food, so this will keep them happy until your own food scraps start to decompose.
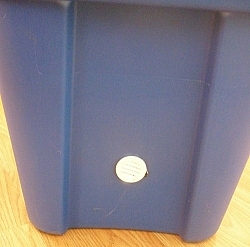
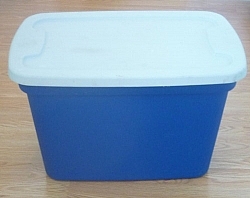
A note on the bin: Any plastic bin with a lid will do, but be sure to drill air holes into the sides! We purchased a special composting bin from Friendly Worm Guy which has a built-in ventilation system, and we’ve never had any problems.
Worms need a balanced diet to produce healthy worm castings (the fertilizer you will add to your garden). They love tea leaves and coffee grinds, bananas, apples, carrot and potato peelings, and a whole whack of fruit and veggies, even seeds. Jeff and Lori said during the workshop that if plants started sprouting from our compost pile, that would mean we’d created a healthy environment.
Some fruit and veggies, like citrus, garlic, and onions, should only be added by experienced composters who know how to counter the effects of increased alkaline/acidic levels. Worms don’t like anything from animal products, so meats, cheeses, dairy products, etc., shouldn’t be added to the bin. Don’t forget that bread contains yeast and should therefore be left out, but dried bread crumbs are okay. The only exception is egg shells (finely crushed), which they need for their gizzards, but these must be fully dry (no liquid yolk).
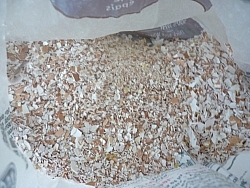
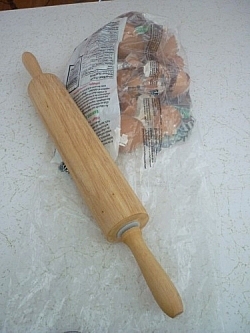
Feeding can be done once or twice a week. Tea leaves, coffee grinds, and small peelings can go right in there. Crush egg shells before adding them. Lori suggests putting them in an old bread bag and crushing them with a rolling pin, which I do, but Marc thinks churning them would be more effective. Who’s got an old butter churn lying around we could borrow?
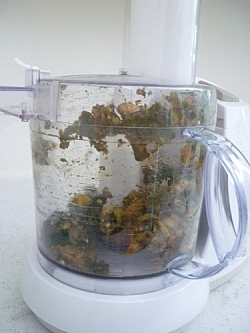
Other food scraps should be finely chopped and stored in sealed containers while decomposing, or frozen to speed up the process. Alternatively, scraps can be put through a food processor to make slurries. This method is wetter, so more vigilance is needed to maintain the proper dampness level of the bin. Bananas don’t fare well in the food processor, so we chop the fresh peelings and stick them in the freezer. We let them thaw and dry off a while before feeding them to the worms. Make sure to mix well whatever is being added to the existing compost.
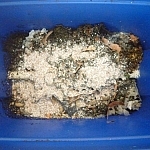
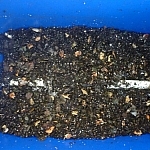
Browse the Vermicomposting Bin Contents gallery — click any image above to view a full-sized version in a pop-up carousel.
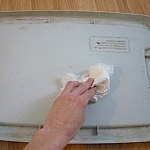
It's important to maintain the bin between feedings. Check to make sure it's not too wet. We wipe the lid and inside walls of the bin with a paper towel almost daily after we've just added food as the moisture from scraps will condensate. If the paper towels are very wet, we throw them out, but if they're mostly dry, we tear them into small bits and add them to the compost. The worms like paper anyway and it will continue to absorb moisture.
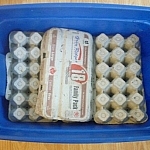
We also place egg cartons on top of the compost pile to absorb moisture. We rotate these when they get too wet. Last year, we would tear up egg cartons into small bits and mix them in with everything else, but that ended up extending the length of the composting cycle way too much. Friendly Worm Guy says a bin should take about six months or so for an adult couple, and it took us a year for our first bin. Clearly, we overfed them and they couldn't keep up — the extra paper had a lot to do with that, I'm sure.
Browse the Vermicomposting Bin Maintenance gallery — click any image above to view a full-sized version in a pop-up carousel.
So once a bin is ready, the theory is that you can just push the worms and castings over to one side of the bin, set up the cleared side as if it were a brand new bin, then wait for the worms to migrate over. Once they do, you can remove the castings and set up the rest of the bin to start a new composting cycle.
Migrating the worms didn't work for us because we over-fed them, so we had to transfer them the manual way. Yep, we picked through all our castings to transfer our worms and their eggs over to a new setup. It took two days in cold autumn! (frowny face). So this time around, we're being a bit pickier about how much we feed them, but it looks like we may have been overcompensating because the bin is already nearly done. Well, that's good news for this year's garden!
For those who are worried about the ick factor, it's really not so bad. If you let your food start to rot before putting it in your bin (rather than putting it in the freezer), this is from where the worst odour will come — when you open the lid! The castings themselves smell delightfully earthy and mixing food scraps into them is no worse than playing in the mud. But worms are wriggly and always will be — some things never change.
After fifteen months, one thing which has changed is that we check Friendly Worm Guy's website less often, though we're still vermicomposting novices. He gave us the skills we needed to have the confidence to get going and start experimenting. We're pretty comfortable with our methods, but whenever we decide to try something new, that's when we look for some trusted advice. We'll need some soon to try migrating our worms again — ain't no way we're picking through them again if we don't have to!
Just for fun: Check out the Adventures of Vermi the Worm.



My grade three class loves our vermicomposter! Even with the help of 20 + eight and nine year olds we’ve managed to keep our worms happy and healthy. We’re also kind of partial to the adventures of Vermi the Worm.
Cool!